


Achievable logoAchievable logo
CCMA
Sign in
Sign up
Purchase
Textbook
Practice exams
Support
How it works
Exam catalog
Mountain with a flag at the peak
Textbook
1. Medical assistant
2. Electronic records
3. Medical terminology and anatomy
4. The fundamentals of infection control
5. Introduction to vital signs
6. The patient interview and history
7. The physical examination
8. Appointment scheduling
9. Insurance billing
10. Diagnostic coding and the ICD-10-CM System
11. Procedural coding
12. Medical billing and reimbursement essentials
13. Assisting with medical specialties
14. Assisting with the musculoskeletal system
15. Assisting with the cardiovascular system
16. Assisting with the respiratory system
17. Assisting with the nervous system
18. Anatomy and physiology of the urinary system
19. Assisting in obstetrics and gynecology
20. Assisting in endocrinology
21. Assisting in ophthalmology & otolaryngology
22. Assisting in gastroenterology
23. Assisting in the immune & lymphatic systems
24. Assisting in pediatrics: the developmental stages and care
25. The medical assistant’s role in caring for the older patient
26. The role of the medical assistant in physical therapy examination and assessment
27. Preparing for minor surgery: room, solutions, and supplies
27.1 Assisting in surgery
27.2 Surgical instruments: cutting and grasping
27.3 Drapes and sutures
27.4 Autoclave loading/unloading, chemical sterilization, and professional responsibilities
27.5 Surgical asepsis, instrument care, and the utility room
27.6 The autoclave process: operation, wrapping, and quality assurance
27.7 Dressings, bandages, and professional conduct
27.8 Introduction to minor office surgery and technology
27.9 Specialized procedures and preoperative preparation
27.10 Sterile technique and intraoperative assistance
27.11 Completing surgery and postoperative care
28. Introduction to the clinical laboratory
29. Urinalysis
30. Blood collection
31. Analysis of blood
32. Electrocardiography and heart structure
33. The principles of pharmacology
34. Essential calculations and measurement systems
35. Solid, liquid, & solutions medication doses
36. Administering medications
37. Metabolism and core nutrient roles
38. Medical emergencies in the healthcare setting
Achievable logoAchievable logo
27.10 Sterile technique and intraoperative assistance
Achievable CCMA
27. Preparing for minor surgery: room, solutions, and supplies
Our CCMA course is currently in development and is a work-in-progress.

Sterile technique and intraoperative assistance

7 min read
Font
Discuss
Share
Feedback

Assisting with surgical procedures

Surgery performed in a medical office is restricted to the management of minor problems and injuries. The medical assistant is expected to assist with preparing the patient and setting up the sterile field. The following procedures must be used without exception when assisting with minor surgery. Individual facilities may have specific guidelines for some of these procedures; however, the theory behind sterile technique is universal, regardless of where you work.

Sterile technique

Accurately performing surgical aseptic technique requires a great deal of concentration and planning of all movements and procedural steps. The procedures covered in this chapter are for minor surgery, but they are the same techniques used during major surgery. To develop a sound knowledge of sterility and sterile technique, use the following memory aid: Everything sterile is white, and everything that is not sterile is black. There is no gray! Sterile surfaces must never come in contact with nonsterile surfaces. If this occurs, the sterile surface immediately is considered contaminated or nonsterile. Constant vigilance and absolute honesty are essential for maintaining sterile techniques. When a sterile surface comes in contact with a nonsterile item, this is called a break in sterility or a break in the sterile field. During any procedure, everything must stop at this point, and the break must be corrected immediately. This usually means the assistant must start over again at the very beginning of the procedure. Any break could lead to serious wound contamination, postoperative infection, and even death.

Before assisting with minor surgery, the medical assistant must perform a series of procedures to ensure surgical asepsis. These skills must be learned, practiced, and followed precisely to establish and maintain the sterile environment required during a surgical procedure. Surgical asepsis directly affects the health and well-being of the patient, the provider, and the office staff and must be practiced without fail.

Sterile field

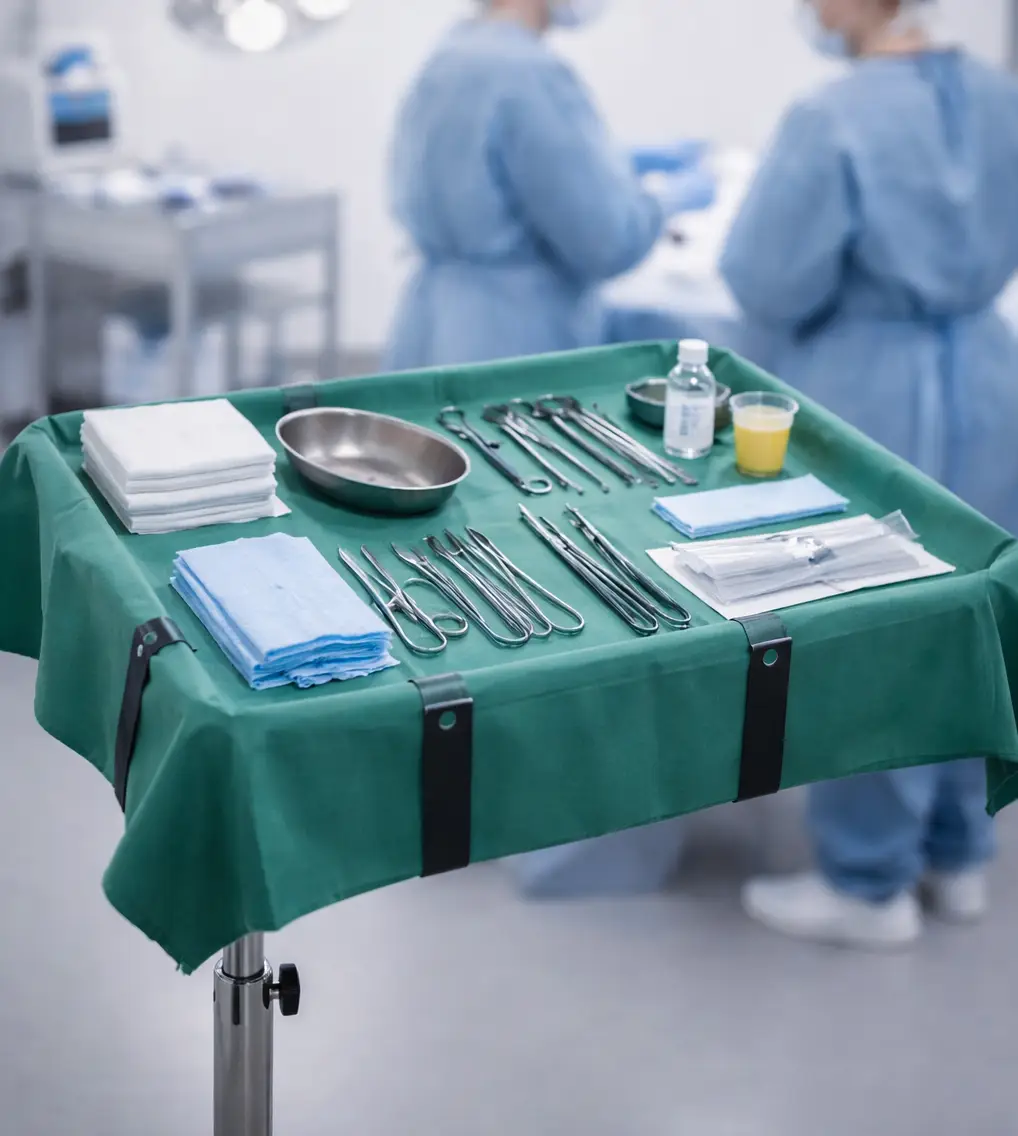
A sterile field is any sterile surface on which sterile items are placed. In the ambulatory facility, a sterile field most often is set up on a Mayo stand. In surgery, a sterile field is created by draping sterile towels (either disposable or from autoclaved packs) over a Mayo stand or table. The surgical site on the patient’s skin is prepared and then covered with sterile towels or drapes so that it also becomes a sterile field.

Hands and hair are two of the greatest sources of contamination when a sterile field is set up. With practice, you will get to know what may be touched with your hands and what must be touched only with sterile gloved hands. Hair that falls freely over the shoulders and forward gives off a cloud of bacteria with every movement. It must always be secured back and up, not touching the shoulders.

Rules for maintaining a sterile field

  • Talking should be kept to a minimum because air currents carry bacteria.
  • Sterile team members should always face one another.
  • Always keep the sterile field in your view. If you turn your back on a sterile field or lose sight of it, it is considered contaminated.
  • Non Sterile body parts (e.g., hands or elbows) and items should never cross over the sterile field.
  • Tables and trays are sterile only at table level; anything that falls below the edge of the Mayo tray is considered contaminated. A 1-inch border around the edge of the tray is considered contaminated, so anything placed on the tray within that 1-inch border is contaminated.
  • Consider a sterile barrier contaminated if it has been wet, cut, or torn.
  • Packages placed on a clean surface are contaminated on the outside, but the inside of the sterilized package may be used as a sterile field.
  • Keep sterile gloved hands above waist level at all times; do not let hands drop below the waist.
  • Never remove and then replace any item in the field (e.g., using sterile forceps to cleanse a wound), or the field is contaminated.
  • The inside of a sterile package remains so if the package is peeled open properly; it should be opened the entire way, and the contents then tossed onto the field without crossing over the sterile area; a two-person transfer can be used, where one person opens the sterile supplies and another, wearing sterile gloves, removes the contents from the package and places them on the sterile tray.
  • If a sterile package falls to the floor, it must be discarded.
  • If you are in doubt about the sterility of anything, consider it contaminated.
Proper setup of a sterile field for a procedure shown
Sterile field setup

Assisting the provider during surgery

The provider ultimately is responsible for the patient. The medical assistant is responsible for ensuring that everything the assistant and the provider will use in caring for the surgical patient is accounted for, ready for use, and prepared in a safe and sterile manner. Every team has preferences about the sequence it follows during routine minor surgery. Once a routine has been established, it should be followed in every case.

The medical assistant sorts and places the scalpels, hemostats, scissors, tissue forceps, and retractors on the sterile field according to their sequence and frequency of use. Scalpels and sharp instruments should be conspicuously placed so that they do not accidentally injure a team member. The provider enters the room after scrubbing and then puts on gloves. The provider drapes the patient with towels or a fenestrated drape as the medical assistant hands him or her the drapes, one at a time. Once the site has been draped, the Mayo stand with the sterile field is positioned below the site, and the medical assistant stands opposite the provider over the patient, ready to help as needed.

Passing instruments

During a procedure, the medical assistant must protect the sterile field from contamination. Notify the provider if a break in sterile technique occurs, dispose of soiled sponges in the biohazard waste container, and anticipate the provider’s need for instruments. The provider may request instruments or may use hand signals. As the team works together over time, the provider may not need to give any signals because the assistant will be able to anticipate the instrument needed next during the procedure.

Instrumentation is logical; if the practitioner requests a suture, scissors will be needed next to cut the suture strand. In the case of sudden hemorrhage from a bleeding vessel, the provider will need an appropriately sized hemostat. While gaining experience, the assistant watches, listens, and learns to judge what will be needed or performed next. While wearing sterile gloves, pass instruments with a firm, purposeful motion so that the provider does not have to look up. Wait until you feel the provider grasp the instrument so that it does not drop onto the patient or the floor. Be careful that you and the provider are protected from injury. Pass the scalpel with the blade down and present the handle to the provider. Hold all instruments by their tips and pass the handle ends into the provider’s palm or fingers.

Specimen collection

If a specimen is collected during a procedure, it is placed in a sterile specimen cup or basin. Do not remove the specimen from the sterile field until the provider gives the order. The provider may want to examine the specimen again during the procedure. After the procedure has been completed, place the specimen in an appropriate container, label it, and send it to the laboratory for analysis.

Sterile technique

  • Absolute separation of sterile (white) and nonsterile (black) surfaces
  • Any contact with nonsterile items = contamination; requires immediate correction
  • Surgical asepsis is critical for patient and staff safety

Sterile field

  • Sterile field: sterile surface for sterile items (e.g., Mayo stand, draped area)
  • Major contamination sources: hands and hair
    • Hair must be secured back and up
  • Key rules:
    • Minimal talking; always face sterile team members
    • Never turn back or lose sight of sterile field
    • Nonsterile items/body parts never cross field
    • Table/tray sterile only at table level; 1-inch border is contaminated
    • Wet, cut, or torn barriers = contaminated
    • Sterile packages: outside contaminated, inside sterile if opened properly
    • Discard any item/package if sterility is in doubt or if it falls to the floor

Assisting the provider during surgery

  • Medical assistant ensures all instruments/supplies are sterile, ready, and accounted for
  • Instruments arranged on sterile field by sequence and frequency of use
  • Sharp instruments placed conspicuously for safety
  • Provider drapes patient; assistant hands drapes and stands ready to assist

Passing instruments

  • Protect sterile field from contamination at all times
  • Notify provider of any break in sterile technique
  • Anticipate provider’s needs; pass instruments firmly and safely
    • Pass scalpel blade down, handle first
    • Hold instruments by tips, present handle to provider

Specimen collection

  • Place specimen in sterile cup or basin; do not remove until ordered
  • Label and send specimen to lab after procedure completion

Sign up for free to take 13 quiz questions on this topic

Previous
Next  | 27.11 Completing surgery and postoperative care
All rights reserved ©2016 - 2026 Achievable, Inc.

Sterile technique and intraoperative assistance

Assisting with surgical procedures

Surgery performed in a medical office is restricted to the management of minor problems and injuries. The medical assistant is expected to assist with preparing the patient and setting up the sterile field. The following procedures must be used without exception when assisting with minor surgery. Individual facilities may have specific guidelines for some of these procedures; however, the theory behind sterile technique is universal, regardless of where you work.

Sterile technique

Accurately performing surgical aseptic technique requires a great deal of concentration and planning of all movements and procedural steps. The procedures covered in this chapter are for minor surgery, but they are the same techniques used during major surgery. To develop a sound knowledge of sterility and sterile technique, use the following memory aid: Everything sterile is white, and everything that is not sterile is black. There is no gray! Sterile surfaces must never come in contact with nonsterile surfaces. If this occurs, the sterile surface immediately is considered contaminated or nonsterile. Constant vigilance and absolute honesty are essential for maintaining sterile techniques. When a sterile surface comes in contact with a nonsterile item, this is called a break in sterility or a break in the sterile field. During any procedure, everything must stop at this point, and the break must be corrected immediately. This usually means the assistant must start over again at the very beginning of the procedure. Any break could lead to serious wound contamination, postoperative infection, and even death.

Before assisting with minor surgery, the medical assistant must perform a series of procedures to ensure surgical asepsis. These skills must be learned, practiced, and followed precisely to establish and maintain the sterile environment required during a surgical procedure. Surgical asepsis directly affects the health and well-being of the patient, the provider, and the office staff and must be practiced without fail.

Sterile field

A sterile field is any sterile surface on which sterile items are placed. In the ambulatory facility, a sterile field most often is set up on a Mayo stand. In surgery, a sterile field is created by draping sterile towels (either disposable or from autoclaved packs) over a Mayo stand or table. The surgical site on the patient’s skin is prepared and then covered with sterile towels or drapes so that it also becomes a sterile field.

Hands and hair are two of the greatest sources of contamination when a sterile field is set up. With practice, you will get to know what may be touched with your hands and what must be touched only with sterile gloved hands. Hair that falls freely over the shoulders and forward gives off a cloud of bacteria with every movement. It must always be secured back and up, not touching the shoulders.

Rules for maintaining a sterile field

  • Talking should be kept to a minimum because air currents carry bacteria.
  • Sterile team members should always face one another.
  • Always keep the sterile field in your view. If you turn your back on a sterile field or lose sight of it, it is considered contaminated.
  • Non Sterile body parts (e.g., hands or elbows) and items should never cross over the sterile field.
  • Tables and trays are sterile only at table level; anything that falls below the edge of the Mayo tray is considered contaminated. A 1-inch border around the edge of the tray is considered contaminated, so anything placed on the tray within that 1-inch border is contaminated.
  • Consider a sterile barrier contaminated if it has been wet, cut, or torn.
  • Packages placed on a clean surface are contaminated on the outside, but the inside of the sterilized package may be used as a sterile field.
  • Keep sterile gloved hands above waist level at all times; do not let hands drop below the waist.
  • Never remove and then replace any item in the field (e.g., using sterile forceps to cleanse a wound), or the field is contaminated.
  • The inside of a sterile package remains so if the package is peeled open properly; it should be opened the entire way, and the contents then tossed onto the field without crossing over the sterile area; a two-person transfer can be used, where one person opens the sterile supplies and another, wearing sterile gloves, removes the contents from the package and places them on the sterile tray.
  • If a sterile package falls to the floor, it must be discarded.
  • If you are in doubt about the sterility of anything, consider it contaminated.

Assisting the provider during surgery

The provider ultimately is responsible for the patient. The medical assistant is responsible for ensuring that everything the assistant and the provider will use in caring for the surgical patient is accounted for, ready for use, and prepared in a safe and sterile manner. Every team has preferences about the sequence it follows during routine minor surgery. Once a routine has been established, it should be followed in every case.

The medical assistant sorts and places the scalpels, hemostats, scissors, tissue forceps, and retractors on the sterile field according to their sequence and frequency of use. Scalpels and sharp instruments should be conspicuously placed so that they do not accidentally injure a team member. The provider enters the room after scrubbing and then puts on gloves. The provider drapes the patient with towels or a fenestrated drape as the medical assistant hands him or her the drapes, one at a time. Once the site has been draped, the Mayo stand with the sterile field is positioned below the site, and the medical assistant stands opposite the provider over the patient, ready to help as needed.

Passing instruments

During a procedure, the medical assistant must protect the sterile field from contamination. Notify the provider if a break in sterile technique occurs, dispose of soiled sponges in the biohazard waste container, and anticipate the provider’s need for instruments. The provider may request instruments or may use hand signals. As the team works together over time, the provider may not need to give any signals because the assistant will be able to anticipate the instrument needed next during the procedure.

Instrumentation is logical; if the practitioner requests a suture, scissors will be needed next to cut the suture strand. In the case of sudden hemorrhage from a bleeding vessel, the provider will need an appropriately sized hemostat. While gaining experience, the assistant watches, listens, and learns to judge what will be needed or performed next. While wearing sterile gloves, pass instruments with a firm, purposeful motion so that the provider does not have to look up. Wait until you feel the provider grasp the instrument so that it does not drop onto the patient or the floor. Be careful that you and the provider are protected from injury. Pass the scalpel with the blade down and present the handle to the provider. Hold all instruments by their tips and pass the handle ends into the provider’s palm or fingers.

Specimen collection

If a specimen is collected during a procedure, it is placed in a sterile specimen cup or basin. Do not remove the specimen from the sterile field until the provider gives the order. The provider may want to examine the specimen again during the procedure. After the procedure has been completed, place the specimen in an appropriate container, label it, and send it to the laboratory for analysis.

Key points

Sterile technique

  • Absolute separation of sterile (white) and nonsterile (black) surfaces
  • Any contact with nonsterile items = contamination; requires immediate correction
  • Surgical asepsis is critical for patient and staff safety

Sterile field

  • Sterile field: sterile surface for sterile items (e.g., Mayo stand, draped area)
  • Major contamination sources: hands and hair
    • Hair must be secured back and up
  • Key rules:
    • Minimal talking; always face sterile team members
    • Never turn back or lose sight of sterile field
    • Nonsterile items/body parts never cross field
    • Table/tray sterile only at table level; 1-inch border is contaminated
    • Wet, cut, or torn barriers = contaminated
    • Sterile packages: outside contaminated, inside sterile if opened properly
    • Discard any item/package if sterility is in doubt or if it falls to the floor

Assisting the provider during surgery

  • Medical assistant ensures all instruments/supplies are sterile, ready, and accounted for
  • Instruments arranged on sterile field by sequence and frequency of use
  • Sharp instruments placed conspicuously for safety
  • Provider drapes patient; assistant hands drapes and stands ready to assist

Passing instruments

  • Protect sterile field from contamination at all times
  • Notify provider of any break in sterile technique
  • Anticipate provider’s needs; pass instruments firmly and safely
    • Pass scalpel blade down, handle first
    • Hold instruments by tips, present handle to provider

Specimen collection

  • Place specimen in sterile cup or basin; do not remove until ordered
  • Label and send specimen to lab after procedure completion

More from Preparing for minor surgery: room, solutions, and supplies

  • Assisting in surgery
  • Surgical instruments: cutting and grasping
  • Drapes and sutures
  • Autoclave loading/unloading, chemical sterilization, and professional responsibilities
  • Surgical asepsis, instrument care, and the utility room