



Blood and blood product administration
Introduction
Blood transfusions can be lifesaving, but they also carry serious risks. From administering packed red blood cells (PRBCs) in trauma to replacing clotting factors in bleeding disorders, blood product administration is a critical nursing responsibility.
The NCLEX often tests this area because even a minor mistake, such as skipping an identification step, can lead to severe consequences. This section covers the essentials: safe handling, monitoring, and knowing how to respond when things go wrong.
Learning objectives
By the end of this section, you should be able to:
- Understand types and indications for blood and blood products
- Safely administer blood transfusions and follow standard protocols
- Identify and manage transfusion reactions
- Document and report transfusion outcomes correctly
Types of blood products
| Product | Use |
| Packed red blood cells (PRBCs) | Increases oxygen-carrying capacity (e.g., anemia, hemorrhage) |
| Platelets | Helps blood clot (e.g., thrombocytopenia, active bleeding) |
| Fresh frozen plasma (FFP) | Replaces clotting factors (e.g., liver disease, DIC, selected cases of warfarin reversal) |
| Cryoprecipitate | Contains fibrinogen and clotting factors (e.g., hypofibrinogenemia, DIC) |
| Albumin | Volume expansion in selected conditions (e.g., hypovolemia) and treatment of hypoalbuminemia |
Pre-transfusion nursing responsibilities
-
Verify orders and consent
- Confirm type of product, volume, rate, and indication.
- Ensure informed consent is signed.
-
Crossmatch and compatibility
- Verify type and screen and confirm crossmatch for ABO/Rh compatibility.
- Notify provider if results are pending or incompatible.
-
Pre-procedure checklist
- Obtain baseline vital signs.
- Assess IV access (20-gauge or larger preferred for PRBCs when feasible).
- Prime tubing with 0.9% normal saline only.
- Use a blood filter to prevent clots and debris from entering circulation.
-
Double-check identification
- Two qualified staff (or approved electronic verification per policy) must verify: the client’s name, ID number, blood type, unit number, and expiration date.
- Never skip this step. It is nondelegable.
During transfusion
-
Start the transfusion slowly for the first 15 minutes.
-
Remain with the client for at least 15 minutes to monitor for acute reactions.
-
Recheck vital signs at 15 minutes, then per institutional protocol (often hourly).
-
Complete transfusion within 4 hours to prevent bacterial growth.
-
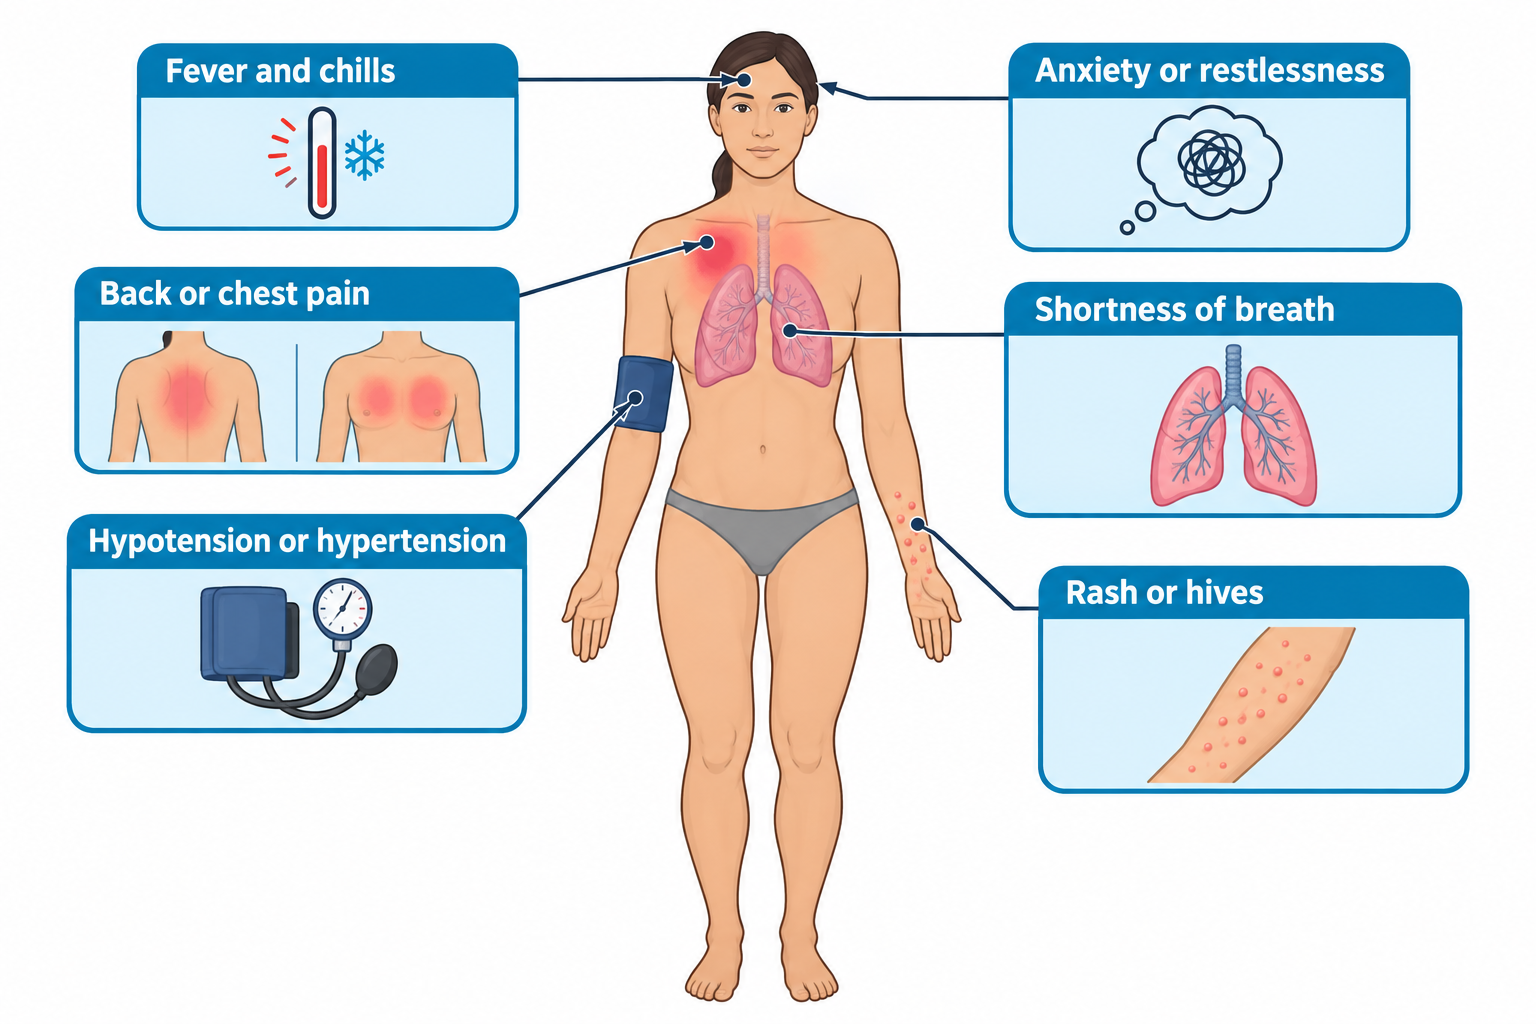
Monitor for signs of transfusion reaction:
- Fever, chills
- Back or chest pain
- Hypotension or hypertension
- Shortness of breath
- Rash or hives
- Anxiety or restlessness
-
Stop the transfusion immediately if a reaction is suspected.
Transfusion reactions and nursing actions
| Type | Signs | Action |
| Febrile non-hemolytic | Fever, chills | Stop transfusion, notify provider, administer antipyretics as ordered |
| Hemolytic (most dangerous) | Back pain, chest pain, fever, hypotension, red urine | Stop transfusion immediately, maintain IV access with new tubing and NS, notify provider/activate rapid response as indicated |
| Allergic (mild) | Rash, itching, hives | Stop the transfusion, notify the provider, and administer antihistamines as ordered |
| Anaphylactic | Wheezing, dyspnea, hypotension | Stop the transfusion, activate the rapid response team, administer oxygen, and prepare to administer epinephrine as ordered |
| Sepsis | High fever, chills, hypotension | Stop transfusion, send cultures, antibiotics |
| Circulatory overload (TACO) | Crackles, edema, dyspnea, ↑BP, JVD | Stop transfusion, elevate HOB, notify provider, give diuretics as ordered |
Post-transfusion
-
Take and document final vital signs.
-
Dispose of blood tubing per facility protocol (usually biohazard container).
-
Document:
- Time started and ended
- Total volume infused
- Client tolerance and any reactions
-
If a reaction occurred:
- Notify the provider and blood bank.
- Return the blood bag and administration tubing for analysis.
- Fill out an incident report.
Clinical vignette: A 70-year-old woman with GI bleeding is receiving PRBCs. Fifteen minutes into the transfusion, she reports chills and flank pain. Her vital signs show hypotension and fever.
Nursing action: Stop the transfusion immediately. Maintain IV access with new tubing primed with 0.9% normal saline, notify the provider and blood bank, and return the blood bag and tubing according to institutional policy. Document the event, prepare to administer IV fluids as ordered, and monitor vital signs and urine output.
Rationale: Fever, chills, flank pain, and hypotension shortly after starting a transfusion suggest an acute hemolytic transfusion reaction. Prompt recognition and immediate discontinuation of the transfusion help prevent further complications.