



Achievable logoAchievable logo
CCMA
Sign in
Sign up
Purchase
Textbook
Practice exams
Support
How it works
Exam catalog
Mountain with a flag at the peak
Textbook
1. Medical assistant
2. Electronic records
3. Medical terminology and anatomy
4. The fundamentals of infection control
5. Introduction to vital signs
6. The patient interview and history
7. The physical examination
8. Appointment scheduling
9. Insurance billing
10. Diagnostic coding and the ICD-10-CM System
11. Procedural coding
12. Medical billing and reimbursement essentials
13. Assisting with medical specialties
14. Assisting with the musculoskeletal system
15. Assisting with the cardiovascular system
16. Assisting with the respiratory system
17. Assisting with the nervous system
18. Anatomy and physiology of the urinary system
19. Assisting in obstetrics and gynecology
20. Assisting in endocrinology
21. Assisting in ophthalmology & otolaryngology
22. Assisting in gastroenterology
23. Assisting in the immune & lymphatic systems
24. Assisting in pediatrics: the developmental stages and care
24.1 Assisting with pediatric examination and screening
24.2 Growth, development, and therapeutic approaches for young children
24.3 Pediatric diagnostic procedures
24.4 Diseases and disorders in pediatrics
25. The medical assistant’s role in caring for the older patient
26. The role of the medical assistant in physical therapy examination and assessment
27. Preparing for minor surgery: room, solutions, and supplies
28. Introduction to the clinical laboratory
29. Urinalysis
30. Blood collection
31. Analysis of blood
32. Electrocardiography and heart structure
33. The principles of pharmacology
34. Essential calculations and measurement systems
35. Solid, liquid, & solutions medication doses
36. Administering medications
37. Metabolism and core nutrient roles
38. Medical emergencies in the healthcare setting
Achievable logoAchievable logo
24.3 Pediatric diagnostic procedures
Achievable CCMA
24. Assisting in pediatrics: the developmental stages and care
Our CCMA course is currently in development and is a work-in-progress.

Pediatric diagnostic procedures

6 min read
Font
Discuss
Share
Feedback

Assisting with diagnostic procedures

The medical assistant that works with pediatric patients will also be involved in assisting with diagnostic procedures. The following sections examine the most common diagnostic procedures done in pediatrics.

Obtaining a urine sample

The easiest way to obtain a urine sample from a child who is toilet trained is to give the parent the container and instructions ahead of time. Then, when the child arrives at the office for the examination, the sample is available to be tested. If the sample is needed while the child is at the office, consult with the parent for the best method to use. If the child is not toilet trained, a pediatric urine collection device can be put on him or her to collect the sample. This device is placed as soon as the child is checked in to increase the chance of obtaining the needed sample before the child leaves. Once the device is in place, the child can be diapered to help hold it properly. Make sure the adhesive sticks tightly so that the specimen collects in the device when the child urinates.

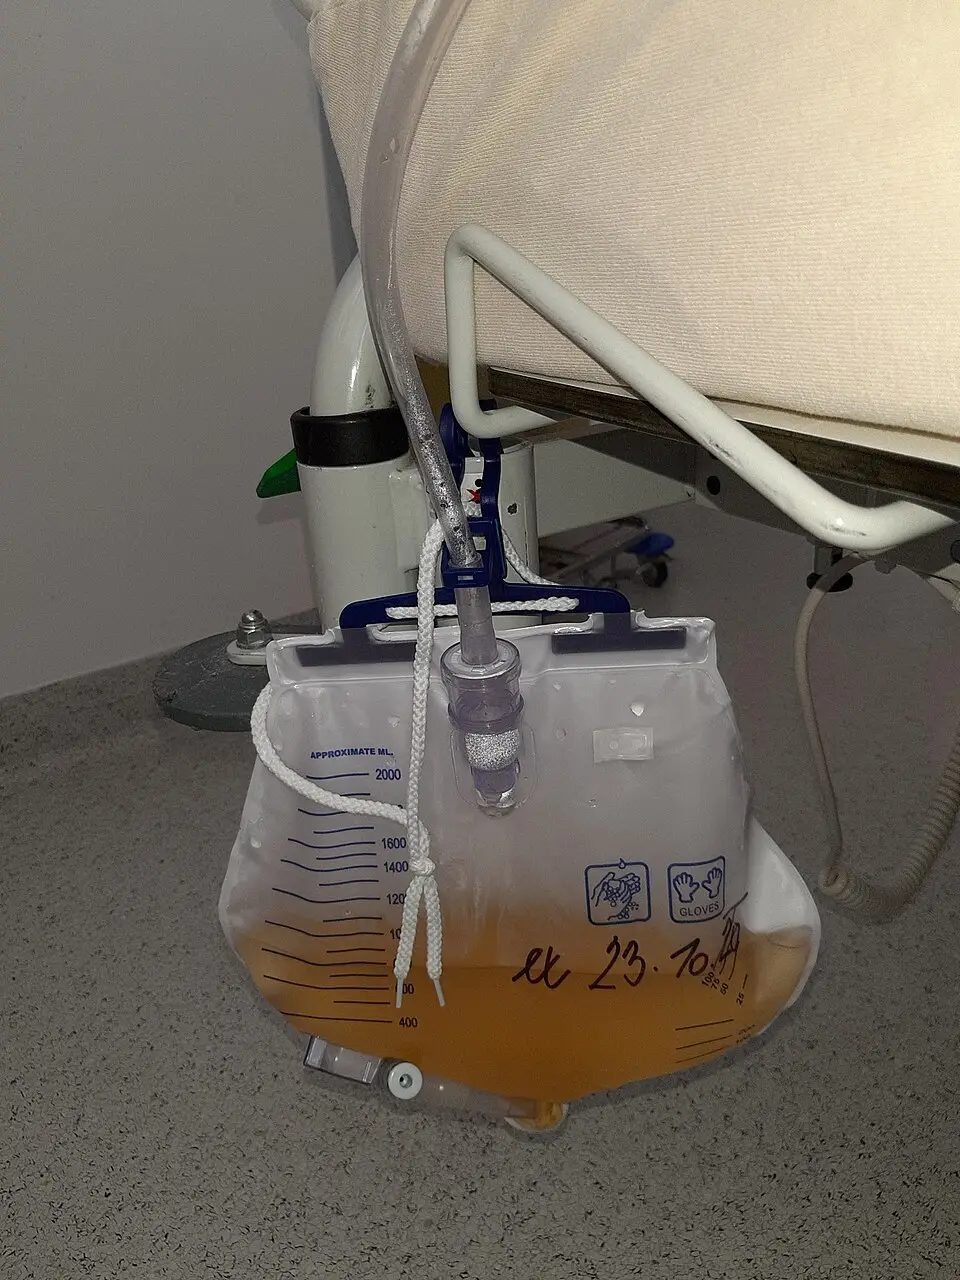
In some cases, the child may need to be catheterized to obtain the specimen. Pediatric catheterization kits contain all the supplies needed for this procedure. When preparing the kit, always remember that this is a sterile procedure. The provider usually asks the parent to help with the infant while the medical assistant labels and prepares the specimen for the laboratory. In some practices, a registered nurse or a specially trained medical assistant may perform a catheterization procedure to collect a pediatric urine sample.

Urinary collection bag used in patient care
Urine bag
Wikimedia Commons
/
CC0 (Creative Commons Zero)

Vision screening

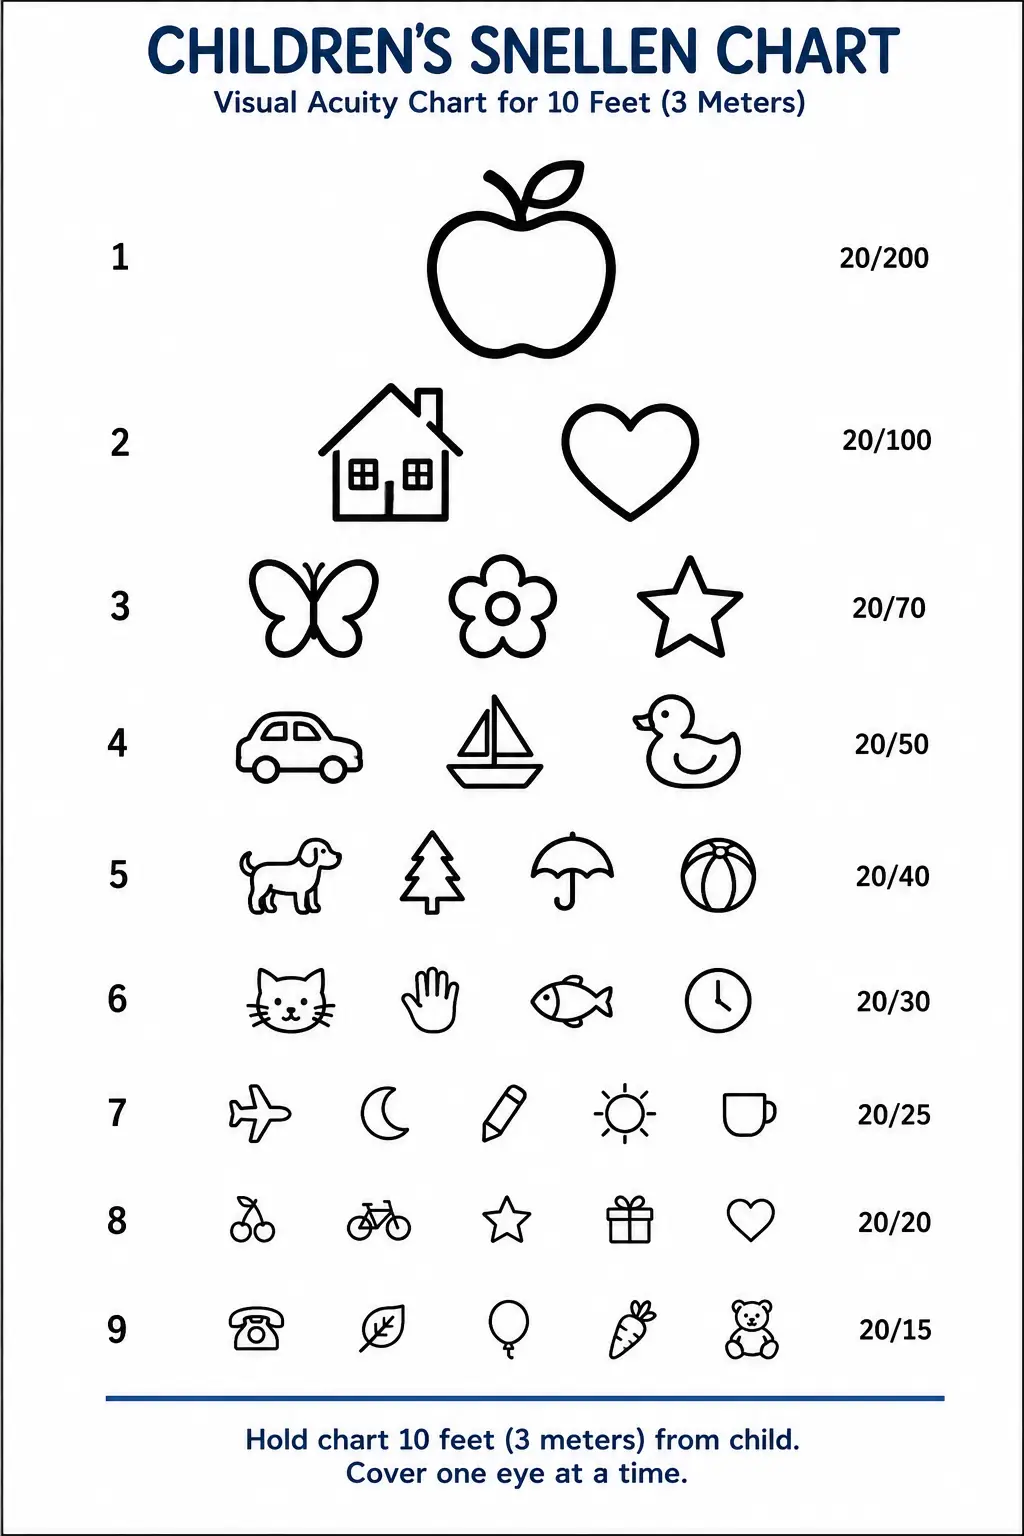
The most common method of performing a distance vision screening with a pediatric patient is using a Snellen chart. You will likely see a variety of charts used. There is one with alphabetic characters, one with tumbling Es, and one with a picture of common objects instead of letters. Each row of characters shown on the chart gets smaller. As the child needs to be cooperative during this screening, it is important to make a game of it and make it fun. When working with the tumbling E chart, it can be helpful to have the E on an individual card and show it to the child before starting the evaluation. Ask the child to point in the direction that the “legs” of the E are pointing. You can rotate the card until you have covered all possible directions. Then when you move to the full chart, the child will have an understanding of what you want him or her to do.

Traditionally the Snellen chart has been mounted on the wall in a hallway that would allow for the 20-foot distance from the chart. There are now Snellen charts that can be displayed on a tablet computer and only require that the patient be 5 feet or less from the chart. For this screening test, patients cover one eye and read each line of the chart until they can no longer get the majority of the characters correct. Then the other eye is covered, and the process is repeated. Finally, patients can view the chart with both eyes and again read each line on the chart until they can no longer get the majority of the characters correct.

The Snellen chart will also have a green bar and red bar that can be used for a very basic color vision test. If a more expanded test is needed, a booklet of polychromatic plates made up of colored dots in a numeric pattern can be used. For pediatric patients who do not know their numbers, there are plates that have a trail the patient can trace . This booklet is referred to as the Ishihara color vision test. For the color vision screening, it is important to have a room with natural sunlight or lights that create that effect and will minimize distractions. If a problem with the patient’s vision is found during either the acuity test or color vision test, the patient will likely be referred to an ophthalmologist.

Pediatric Snellen chart for visual acuity testing
Pediatric snellen chart
Ishihara color vision test plates used to detect color blindness
Ishihara color vision test
Wikimedia Commons
/
CC0 (Creative Commons Zero)

Hearing screening

Hearing screening is a common test for pediatric patients. It is usually accomplished by using an audiometer. The audiometer can assess hearing at various frequencies and intensities. The screening involves headphones placed over the child’s ears. Before putting on the headphones, explain to children what to expect. They will hear sounds in one ear or the other. When they hear the sound, they should raise that hand; if the sound is in the right ear, they should raise their right hand. Tell them that some of the sounds will be very quiet and some will be louder, so if they think they hear a sound, they should raise their hand.

Audiometers may have the option to do the test manually or automatically. The medical assistant should be familiar with the provider’s preference when performing the screening test. If a hearing deficit is indicated, the patient will likely be referred to an audiologist for further testing.

Assisting with diagnostic procedures

  • Pediatric urine sample collection:
    • Toilet-trained: parent collects sample at home or in office
    • Non–toilet-trained: use pediatric urine collection device or catheterization (sterile procedure)
    • Label and prepare specimen; parent may assist infant
  • Vision screening:
    • Use Snellen chart (letters, tumbling Es, or pictures); test each eye separately and both eyes together
    • Color vision: basic test with Snellen chart bars or Ishihara plates (polychromatic dots)
    • Refer to ophthalmologist if abnormalities found
  • Hearing screening:
    • Use audiometer with headphones; test various frequencies/intensities
    • Child signals when sound is heard; manual or automatic test modes
    • Refer to audiologist if deficit detected

Assisting with treatments

  • Immunizations:
    • Follow CDC/state immunization schedules; parents may refuse
    • Vaccines: attenuated organisms/toxins stimulate antibody production
    • Booster doses maintain immunity; some vaccines contraindicated in egg allergy
    • Adverse reactions: fever, swelling, urticaria, breathing issues—report immediately
    • Provide Vaccine Information Statement (VIS) before administration; document VIS date, vaccine details, side effects, and provider info
    • Maintain and update immunization records for parents and schools
  • Safe handling and storage of vaccines:
    • Assign responsible person and backup for vaccine management
    • Maintain inventory log: name, doses, date, condition, manufacturer, lot, expiration
    • Store vaccines in dedicated units (refrigerator/freezer); no food/drinks
    • Monitor temperatures (refrigerator: 35°–46°F/2°–8°C; freezer: −58°–5°F/−50°–15°C); log temperatures twice daily
    • Use first-to-expire vials first; post storage instructions and emergency procedures
    • Have health department policies on hand
  • Nebulizers:
    • Administer inhaled medication for respiratory conditions (asthma, croup, RSV)
    • First dose often given in office for observation and caregiver instruction
    • Use mask for young children; provide written instructions and contact info

The adolescent patient

  • Examination components:
    • Screen height, weight, diet, exercise
    • STI screening; Pap test for sexually active females (HPV)
    • Review/update vaccination status; assess high-risk behaviors (substance use, smoking, sexual activity)
  • Approach:
    • Build trust; maintain professionalism and empathy
    • Address embarrassment and privacy concerns

Sign up for free to take 10 quiz questions on this topic

Previous
Next  | 24.4 Diseases and disorders in pediatrics
All rights reserved ©2016 - 2026 Achievable, Inc.

Pediatric diagnostic procedures

Assisting with diagnostic procedures

The medical assistant that works with pediatric patients will also be involved in assisting with diagnostic procedures. The following sections examine the most common diagnostic procedures done in pediatrics.

Obtaining a urine sample

The easiest way to obtain a urine sample from a child who is toilet trained is to give the parent the container and instructions ahead of time. Then, when the child arrives at the office for the examination, the sample is available to be tested. If the sample is needed while the child is at the office, consult with the parent for the best method to use. If the child is not toilet trained, a pediatric urine collection device can be put on him or her to collect the sample. This device is placed as soon as the child is checked in to increase the chance of obtaining the needed sample before the child leaves. Once the device is in place, the child can be diapered to help hold it properly. Make sure the adhesive sticks tightly so that the specimen collects in the device when the child urinates.

In some cases, the child may need to be catheterized to obtain the specimen. Pediatric catheterization kits contain all the supplies needed for this procedure. When preparing the kit, always remember that this is a sterile procedure. The provider usually asks the parent to help with the infant while the medical assistant labels and prepares the specimen for the laboratory. In some practices, a registered nurse or a specially trained medical assistant may perform a catheterization procedure to collect a pediatric urine sample.

Vision screening

The most common method of performing a distance vision screening with a pediatric patient is using a Snellen chart. You will likely see a variety of charts used. There is one with alphabetic characters, one with tumbling Es, and one with a picture of common objects instead of letters. Each row of characters shown on the chart gets smaller. As the child needs to be cooperative during this screening, it is important to make a game of it and make it fun. When working with the tumbling E chart, it can be helpful to have the E on an individual card and show it to the child before starting the evaluation. Ask the child to point in the direction that the “legs” of the E are pointing. You can rotate the card until you have covered all possible directions. Then when you move to the full chart, the child will have an understanding of what you want him or her to do.

Traditionally the Snellen chart has been mounted on the wall in a hallway that would allow for the 20-foot distance from the chart. There are now Snellen charts that can be displayed on a tablet computer and only require that the patient be 5 feet or less from the chart. For this screening test, patients cover one eye and read each line of the chart until they can no longer get the majority of the characters correct. Then the other eye is covered, and the process is repeated. Finally, patients can view the chart with both eyes and again read each line on the chart until they can no longer get the majority of the characters correct.

The Snellen chart will also have a green bar and red bar that can be used for a very basic color vision test. If a more expanded test is needed, a booklet of polychromatic plates made up of colored dots in a numeric pattern can be used. For pediatric patients who do not know their numbers, there are plates that have a trail the patient can trace . This booklet is referred to as the Ishihara color vision test. For the color vision screening, it is important to have a room with natural sunlight or lights that create that effect and will minimize distractions. If a problem with the patient’s vision is found during either the acuity test or color vision test, the patient will likely be referred to an ophthalmologist.

Hearing screening

Hearing screening is a common test for pediatric patients. It is usually accomplished by using an audiometer. The audiometer can assess hearing at various frequencies and intensities. The screening involves headphones placed over the child’s ears. Before putting on the headphones, explain to children what to expect. They will hear sounds in one ear or the other. When they hear the sound, they should raise that hand; if the sound is in the right ear, they should raise their right hand. Tell them that some of the sounds will be very quiet and some will be louder, so if they think they hear a sound, they should raise their hand.

Audiometers may have the option to do the test manually or automatically. The medical assistant should be familiar with the provider’s preference when performing the screening test. If a hearing deficit is indicated, the patient will likely be referred to an audiologist for further testing.

Key points

Assisting with diagnostic procedures

  • Pediatric urine sample collection:
    • Toilet-trained: parent collects sample at home or in office
    • Non–toilet-trained: use pediatric urine collection device or catheterization (sterile procedure)
    • Label and prepare specimen; parent may assist infant
  • Vision screening:
    • Use Snellen chart (letters, tumbling Es, or pictures); test each eye separately and both eyes together
    • Color vision: basic test with Snellen chart bars or Ishihara plates (polychromatic dots)
    • Refer to ophthalmologist if abnormalities found
  • Hearing screening:
    • Use audiometer with headphones; test various frequencies/intensities
    • Child signals when sound is heard; manual or automatic test modes
    • Refer to audiologist if deficit detected

Assisting with treatments

  • Immunizations:
    • Follow CDC/state immunization schedules; parents may refuse
    • Vaccines: attenuated organisms/toxins stimulate antibody production
    • Booster doses maintain immunity; some vaccines contraindicated in egg allergy
    • Adverse reactions: fever, swelling, urticaria, breathing issues—report immediately
    • Provide Vaccine Information Statement (VIS) before administration; document VIS date, vaccine details, side effects, and provider info
    • Maintain and update immunization records for parents and schools
  • Safe handling and storage of vaccines:
    • Assign responsible person and backup for vaccine management
    • Maintain inventory log: name, doses, date, condition, manufacturer, lot, expiration
    • Store vaccines in dedicated units (refrigerator/freezer); no food/drinks
    • Monitor temperatures (refrigerator: 35°–46°F/2°–8°C; freezer: −58°–5°F/−50°–15°C); log temperatures twice daily
    • Use first-to-expire vials first; post storage instructions and emergency procedures
    • Have health department policies on hand
  • Nebulizers:
    • Administer inhaled medication for respiratory conditions (asthma, croup, RSV)
    • First dose often given in office for observation and caregiver instruction
    • Use mask for young children; provide written instructions and contact info

The adolescent patient

  • Examination components:
    • Screen height, weight, diet, exercise
    • STI screening; Pap test for sexually active females (HPV)
    • Review/update vaccination status; assess high-risk behaviors (substance use, smoking, sexual activity)
  • Approach:
    • Build trust; maintain professionalism and empathy
    • Address embarrassment and privacy concerns

More from Assisting in pediatrics: the developmental stages and care

  • Assisting with pediatric examination and screening
  • Growth, development, and therapeutic approaches for young children
  • Diseases and disorders in pediatrics